On the Manage POIs page, you can import and manage collections of points of interest.

To import new points of interest:
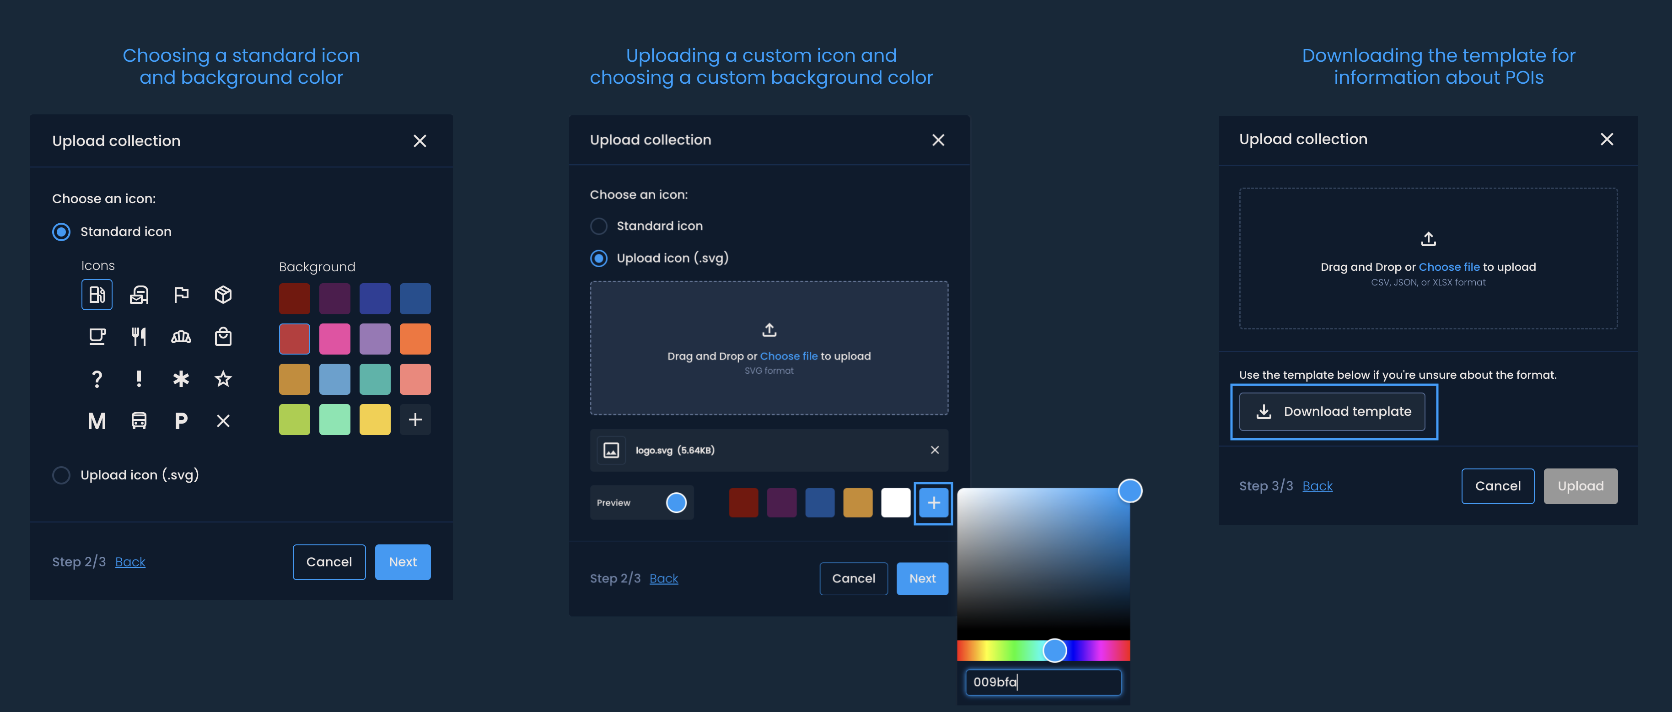
Click the Add new collection button.
Enter a name for the group of POIs and provide a brief description.
Select an icon to visualize the specific POIs. You can choose one of the standard icons from our library and customize its background color, or you can upload a custom icon (.svg).
Next, you need to upload a CSV, JSON, or XLSX file with information about the POIs. This file needs to contain the latitude and longitude of each point. Optionally, you can include other relevant information, such as the name, working hours, rent fee, and useful notes.

Added collections will appear in the list on the Manage POIs page. You can visualize them on the Delivery area analysis page in the corresponding delivery areas. For example, you can evaluate the potential of these locations using the Generate on POIs feature.
You can upload a custom icon if you want to use a specific image for a group of POIs. Before uploading, make sure it is by the following requirements:
File format: SVG
File size: Cannot be larger than 1 MB
File format: CSV, JSON, XLSX
File size: Cannot be larger than 3 MB
Required columns: Latitude and longitude are the only required columns and must have values for all points (cells). The accepted column labels are lat and lng or Latitude and Longitude, respectively.
Data format:
Latitude and longitude values must be a number (float) and can also include decimals.
If other columns are included (e.g., name, city, working hours, etc.), their values must be alphanumeric and cannot contain the following characters: ' " ; < >
If the file format is CVS (Comma Separated Values), the delimiter must be a comma (,).
Here’s an example of a properly formatted file: